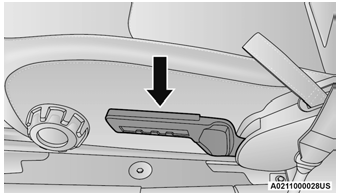
Jeep Wrangler: DOORS / Front Door Removal
WARNING!
Do not drive your vehicle on public roads with the doors removed as you will lose the protection they can provide. This procedure is furnished for use during off-road operation only.
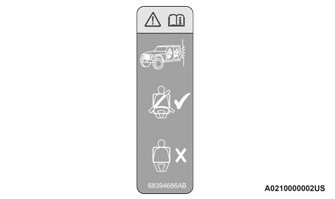
Door Removal Warning Label
WARNING!
- All occupants must wear seat belts during off-road operation with doors removed. For off-road driving tips.
- Do not store detached doors inside of the vehicle, as they may cause personal injury in the event of an accident.
Outside rearview mirrors are mounted on the doors. If you choose to remove the doors, see an authorized dealer for a replacement cowlmounted outside mirror. Federal law requires outside mirrors on vehicles for on-road use.
NOTE:
- Doors are heavy; use caution when removing them.
- Hinge pin can break if overtightened during door reinstall (Max Torque: 7.5 ft· lb / 10 N·m). For off-road driving tips.
- When front doors are removed, the message “Blind Spot Alert Temporarily Unavailable” will display in the instrument cluster display. Power Mirrors and Power Door Locks will also be unavailable.
- Roll down the glass window to prevent any damage.
- Remove the hinge pin screws from the
upper and lower outside hinges (using a
#T50 Torx head driver).
NOTE:
The hinge pin screws and nuts can be stowed in the rear cargo tray located under the rear load floor.
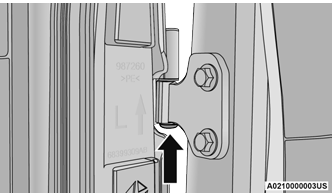
Hinge Pin Screw
- Remove the plastic wiring access door
under the instrument panel by sliding the
plastic panel along the door frame toward
the seats until the tabs are detached.
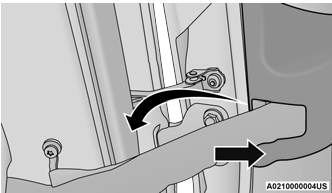
Wiring Access Door
NOTE:
Do not pry back to open, as this will break the plastic cover.
- Pull up on the red locking tab to unlock the
wiring harness.
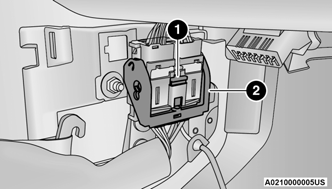
Closed Wiring Harness
- Locking Tab
- Wiring Harness
- Push and hold down the black security tab
under the wiring harness, and lift the
harness into the open position.
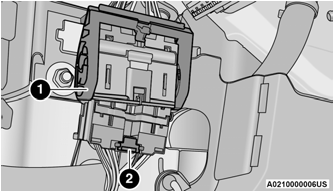
Open Wiring Harness
- With the wiring harness open, pull downward on the wiring connector to unplug. Store the wiring connector in the lower door basket.
- Remove the check screw from the center
door check (using a #T40 Torx head driver).
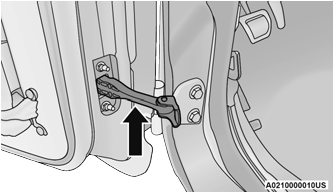
Door Check (Detached)
- With the door open, lift the door with the
help of another person, to clear the hinge
pins from their hinges and remove the door.
To reinstall the door(s), perform the previous
steps in the reverse order.
NOTE:
The upper hinge has a longer pin, which can be used to assist in guiding the door into place when reinstalling.
 Child-Protection Door Lock System — Rear Doors
To provide a safer environment for small
children riding in the rear seats, the rear doors
are equipped with a Child-Protection Door Lock
system.
To use the system, open each rear door, use a
flat blade screwdriver (or mechanical key) and
rotate the dial to the lock or unlock position...
 Rear Door Removal (Four-Door Models)
WARNING!
Do not drive your vehicle on public roads with
the doors removed as you will lose the protection
they can provide. This procedure is furnished
for use during off-road operation only...
Other information:
Jeep Wrangler 2018-2026 Owners Manual: Air Bag Warning Light
This warning light will illuminate to indicate a fault with the air bag, and will turn on for four to eight seconds as a bulb check when the ignition is placed in the ON/RUN or ACC/ON/RUN position. This light will illuminate with a single chime when a fault with the air bag has been detected, it will stay on until the fault is cleared...
Jeep Wrangler 2018-2026 Owners Manual: REFUELING THE VEHICLE — DIESEL ENGINE (IF EQUIPPED)
The fuel filler cap is located on the driver's side of the vehicle. If the fuel filler cap is lost or damaged, be sure the replacement cap is the correct one for this vehicle. Fuel Filler Door Fuel and Diesel Exhaust Fluid (DEF) Fill Location Diesel Fuel Filler DEF Filler NOTE: When the fuel nozzle “clicks” or shuts off, the fuel tank is full...

