
Jeep Wrangler: INTERIOR STORAGE AND EQUIPMENT / Auxiliary Switches — If Equipped
Four auxiliary switches located in the lower switch bank of the instrument panel can be used to power various electrical devices. You have the ability to configure the functionality of the auxiliary switches via the Uconnect Settings.
All switches can be configured as follows:
- Switch type operation: Latching or Momentary
- Power source: Battery or Ignition
- Ability to hold last state across key cycles: On or Off
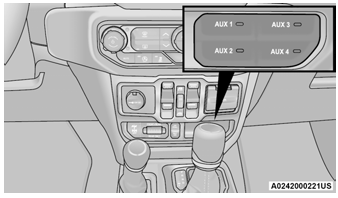
Auxiliary Switches
NOTE:
Holding last state conditions are met when switch type is set to latching and power source is set to ignition.
The auxiliary switches manage the relays that power four blunt cut wires. These wires are located under the instrument panel in the passenger compartment and under the hood to the right, near the battery.
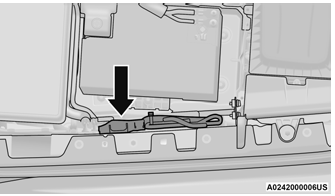
Auxiliary Switch Connections – Under Hood
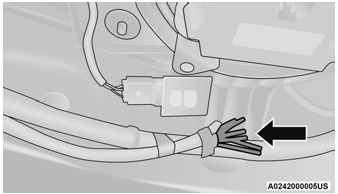
Auxiliary Switch Connections – Under Instrument Panel
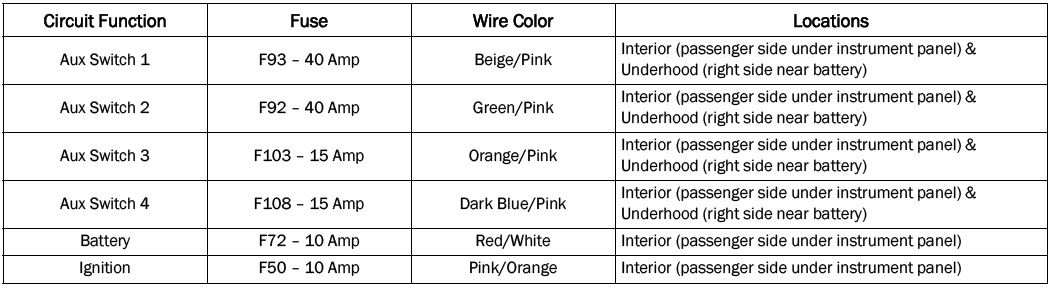
In addition to the four auxiliary switch wires, a fused battery wire and ignition wire are also located in the interior, in the passenger side under the instrument panel.
A kit of splices and heat shrink tubing are provided with the auxiliary switches to aid in the connection/installation of your electrical devices.
Wire Color Chart
 Power Inverter — If Equipped
There is a 115 Volt, 150 Watt inverter outlet
located on the back of the center console to
convert DC current to AC current.
This outlet can power cellular phones,
electronics and other low power devices
requiring power up to 150 Watts...
 POWER WINDOWS — IF EQUIPPED
The power window switches are located on the
instrument panel below the climate controls.
Push the switch downward to open the window
and upward to close the window...
Other information:
Jeep Wrangler 2018-2026 Owners Manual: When To Use 4WD Low Range
When off-road driving, shift into 4WD Low for additional traction and control on slippery or difficult terrain, ascending or descending steep hills, and to increase low speed pulling power. This range should be limited to extreme situations such as deep snow, mud, steep inclines, or sand where additional low speed pulling power is needed...
Jeep Wrangler 2018-2026 Owners Manual: Preparations For Jacking
Park on a firm, level surface. Avoid ice or slippery areas.WARNING! Do not attempt to change a tire on the side of the vehicle close to moving traffic. Pull far enough off the road to avoid being hit when operating the jack or changing the wheel...
Categories
- Manuals Home
- Jeep Wrangler Owners Manual
- Jeep Wrangler Service Manual
- SiriusXM® Satellite Radio Mode — If Equipped
- Draining Fuel/Water Separator Filter — Diesel Engine
- WARNING LIGHTS AND MESSAGES
- New on site
- Most important about car
Turn Signals. Lane Change Assist — If Equipped
Turn Signals
Move the multifunction lever up or down to activate the turn signals. The arrows on each side of the instrument cluster flash to show proper operation.
NOTE:
If either light remains on and does not flash, or there is a very fast flash rate, check for a defective outside light bulb.
