Jeep Wrangler 2018-2026 Owners Manual / GETTING TO KNOW YOUR VEHICLE / WRANGLER TOPS / Removing The Soft Top
Jeep Wrangler: WRANGLER TOPS / Removing The Soft Top
Use this QR code to access your digital experience.
- Fully lower the soft top
CAUTION!
Failure to follow the next steps could result in damage to the Soft Top or vehicle.
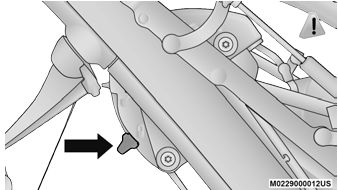
- Make sure the lift assist mechanism on
both the left and right sides are in the “lock”
position, and an audible “click” is heard
when pushing down on the #1 bow from
each of the lift assist mechanisms before
removing.
Step Two
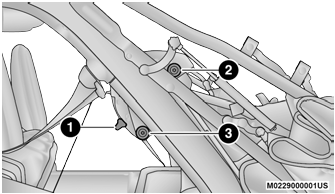
- Using the provided #40 Torx head driver
and ratchet, unscrew the two Torx head
screws on each lift assist mechanism, then
lift the mechanism up and away from the
vehicle.
Step Three
-
Lock Position
-
Torx Head Screw
-
Torx Head Screw
-
- Pull the release lever on top of the rail
rearward to release the side link from the
track.
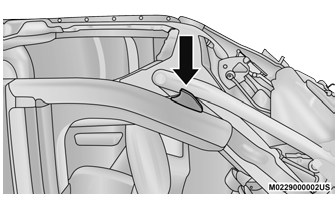
Step Four
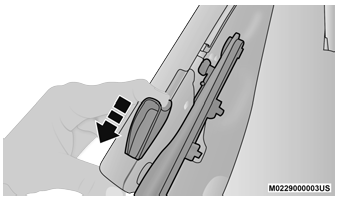
Step Four
- Repeat on the opposite side.
- Utilizing two people, lift the soft top up and
away from the vehicle, careful to avoid the
vehicle’s sport bar, trim, and tire carrier.
Store the soft top in a safe, clean, and dry
location.
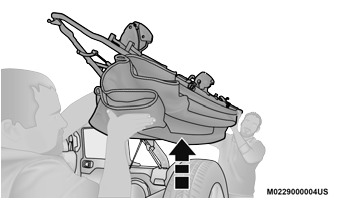
Step Six
- Using the provided #50 Torx head driver
and ratchet, unscrew the Torx screw on both
rear corners of the vehicle, removing the
retainers.
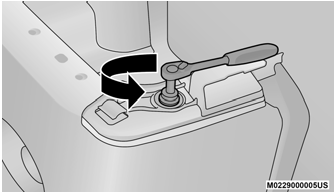
Step Seven
 Install The Rear Window
Guide the rear window into the retainer
from left to right while keeping the window
level.
Step One
Insert the swing gate bar into the retainers
at the bottom of the window from left to the
right...
 Installing The Soft Top
If currently installed, remove the hard top.
Install the door rails, starting with the front,
followed by the rear on each side. For
instructions and appropriate torque specifications
for the door rail Torx screws...
Other information:
Jeep Wrangler 2018-2026 Owners Manual: To Lock The Swing Gate
With a valid Passive Entry key fob within 5 ft (1.5 m) of the swing gate handle, pushing the Passive Entry lock button will lock the vehicle doors and the swing gate. NOTE: After pushing the door handle button, you must wait two seconds before you can lock or unlock the doors, using any Passive Entry door handle...
Jeep Wrangler 2018-2026 Owners Manual: Seat Belts And Pregnant Women
Seat Belts And Pregnant Women Seat belts must be worn by all occupants including pregnant women: the risk of injury in the event of an accident is reduced for the mother and the unborn child if they are wearing a seat belt. Position the lap belt snug and low below the abdomen and across the strong bones of the hips...
Copyright © 2026 www.jewrangler.com

