Jeep Wrangler: FOUR–WHEEL DRIVE OPERATION / Axle Lock (Tru-Lok) Rear Only — If Equipped
The rear axle may be locked in 4WD High if the proper conditions are met.
WARNING!
This mode is intended for off-highway or off-road use only and should not be used on any public roadways.
The AXLE LOCK switch is located on the instrument panel (to the right of the steering column).
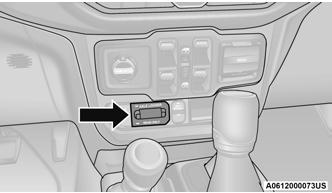
Axle Lock Switch Panel
This feature will only activate when the following conditions are met:
- Ignition in RUN position, vehicle in 4WD High.
- The vehicle must be in Off Road+ active.
- Vehicle must be in ESC “Full Off” mode.
- Vehicle must not be actively in a high wheel slip or tight cornering condition.
To activate the system, push the AXLE LOCK switch down to lock the rear axle only (“REAR ONLY” will illuminate).
To unlock the rear axle, push the AXLE LOCK OFF button.
Axle lock will disengage if the vehicle is taken out of 4WD High, Off Road+ is turned off by the driver, ESC “Full Off” is exited, or the ignition switch is turned to the OFF position.
NOTE:
The indicator lights will flash until the rear axle is fully locked or unlocked.
The rear axle lock system may temporarily disengage the rear locker under some conditions.
If this occurs, the rear axle will automatically re-lock as soon as the system allows.
 Axle Lock (Tru-Lok) Front And Rear — If Equipped
The AXLE LOCK switch is located on the
instrument panel (to the right of the steering
column).
Axle Lock Switch Panel
This feature will only activate when the following
conditions are met:
Ignition in RUN position, vehicle in 4WD Low...
 Electronic Sway Bar Disconnect — If Equipped
Your vehicle may be equipped with an
electronic disconnecting stabilizer/sway bar.
This system allows greater front suspension
travel in off-road situations...
Other information:
Jeep Wrangler 2018-2026 Owners Manual: Hill Start Assist (HSA)
The HSA system is designed to mitigate roll back from a complete stop while on an incline. If the driver releases the brake while stopped on an incline, HSA will continue to hold the brake pressure for a short period. If the driver does not apply the throttle before this time expires, the system will release brake pressure and the vehicle will roll down the hill as normal...
Jeep Wrangler 2018-2026 Owners Manual: Oil Change Reset — If Equipped
Your vehicle may be equipped with an engine oil change indicator system. The “Oil Change Required” message will display in the instrument cluster display for five seconds after a single chime has sounded to indicate the next scheduled oil change interval...
Categories
- Manuals Home
- Jeep Wrangler Owners Manual
- Jeep Wrangler Service Manual
- The ASSIST and SOS Call Buttons On Your Rearview Mirror Or Overhead Console
- UCONNECT SETTINGS
- SOS Call System Limitations
- New on site
- Most important about car
Basic Voice Commands
The basic Voice Commands below can be given at any point while using your Uconnect system. Push the VR button on the steering wheel. After the beep, say:
“Cancel” to stop a current voice session. “Help” to hear a list of suggested Voice Commands. “Repeat” to listen to the system prompts again.