Jeep Wrangler 2018-2026 Owners Manual / GETTING TO KNOW YOUR VEHICLE / WRANGLER TOPS / Hard Top Front Panel(s) Removal / Hard Top Components
Jeep Wrangler: Hard Top Front Panel(s) Removal / Hard Top Components
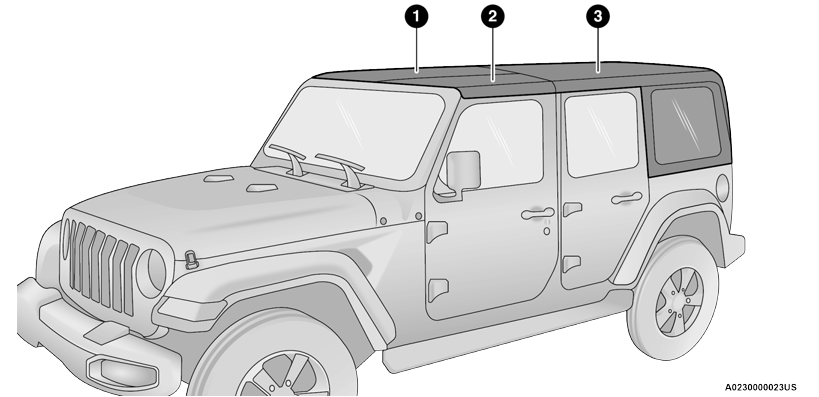
Four Door Hard Top Components
- Right Side Panel
- Left Side Panel
- Hard Top
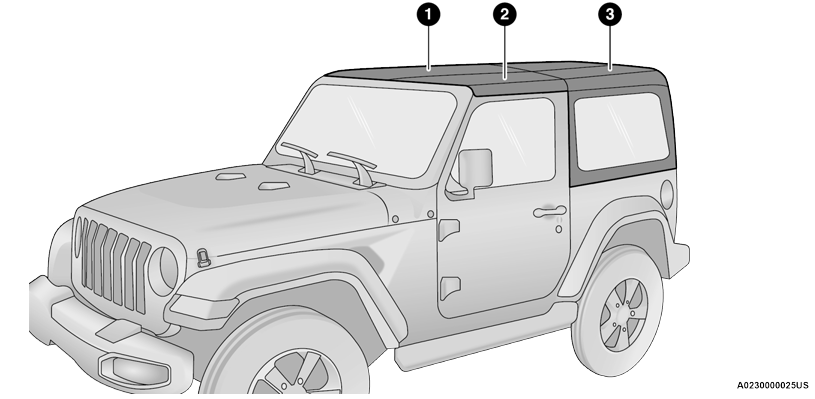
Two Door Hard Top Components
- Right Side Panel
- Left Side Panel
- Hard Top
NOTE:
- All hard top removal and installation instructions are applicable to both two and four door model vehicles.
- Images shown are of four door models, and appearance of two door model components may differ.
- The left side panel must be removed before removing the right side panel.
To remove the hard top front panel(s), proceed as follows:
- Fold down the sun visor against the windshield.
- Turn the three L-shaped locks on the left
side panel (one at the front, the rear, and
outside), unlocking them from the roof.
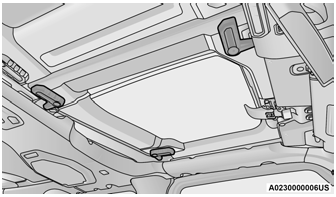
Step Two
- Unlatch the left side header panel latch
located at the top of the windshield.
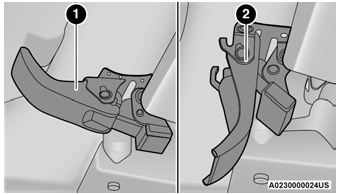
Step Three
-
Header Panel Latched
-
Unlatched Position
-
Remove the left side panel.
-
Repeat the steps above to remove the right side panel.
-
 Hard Top Front Panel(s) Removal
Use this QR code to access your
digital experience.
CAUTION!
The hard top is not designed to carry any
additional loads, such as after-market roof
racks, spare tires, building materials,
hunting or camping supplies, etc...
 Hard Top Panel(s) Storage Bag — If Equipped
The Freedom Top panels storage bag allows you
to store your hard top panels. The storage bag
contains two compartments.
Lay the bag for the Freedom Top panels down
so the loops and hooks are facing upward...
Other information:
Jeep Wrangler 2018-2026 Owners Manual: Trailer And Tongue Weight
Never exceed the maximum tongue weight stamped on your bumper or trailer hitch. Weight Distribution Consider the following items when computing the weight on the rear axle of the vehicle: The tongue weight of the trailer. The weight of any other type of cargo or equipment put in or on your vehicle...
Jeep Wrangler 2018-2026 Owners Manual: Installing Child Restraints Using The Top Tether Anchorage
WARNING! Do not attach a tether strap for a rear-facing car seat to any location in front of the car seat, including the seat frame or a tether anchorage. Only attach the tether strap of a rear-facing car seat to the tether anchorage that is approved for that seating position, located behind the top of the vehicle seat...
Categories
- Manuals Home
- Jeep Wrangler Owners Manual
- Jeep Wrangler Service Manual
- SiriusXM® Satellite Radio Mode — If Equipped
- Auxiliary Switches — If Equipped
- 2.0L Engine and 3.6L Engine
- New on site
- Most important about car
Erasing All The HomeLink® Channels
To erase the channels, follow this procedure:
Place the ignition switch into the ON/RUN position. Push and hold the two outside HomeLink® buttons (I and III) for up to 20 seconds, or until the HomeLink® indicator light flashes.NOTE:
Erasing all channels should only be performed when programming HomeLink® for the first time. Do not erase channels when programming additional buttons.
Copyright © 2026 www.jewrangler.com